Before the install team goes on site, they need four core documents: a site plan, an equipment schedule, the proposal (or invoice), and manufacturer datasheets. Each section below explains what that document is for and where to pull it from in Photonik Pro.
Site plan
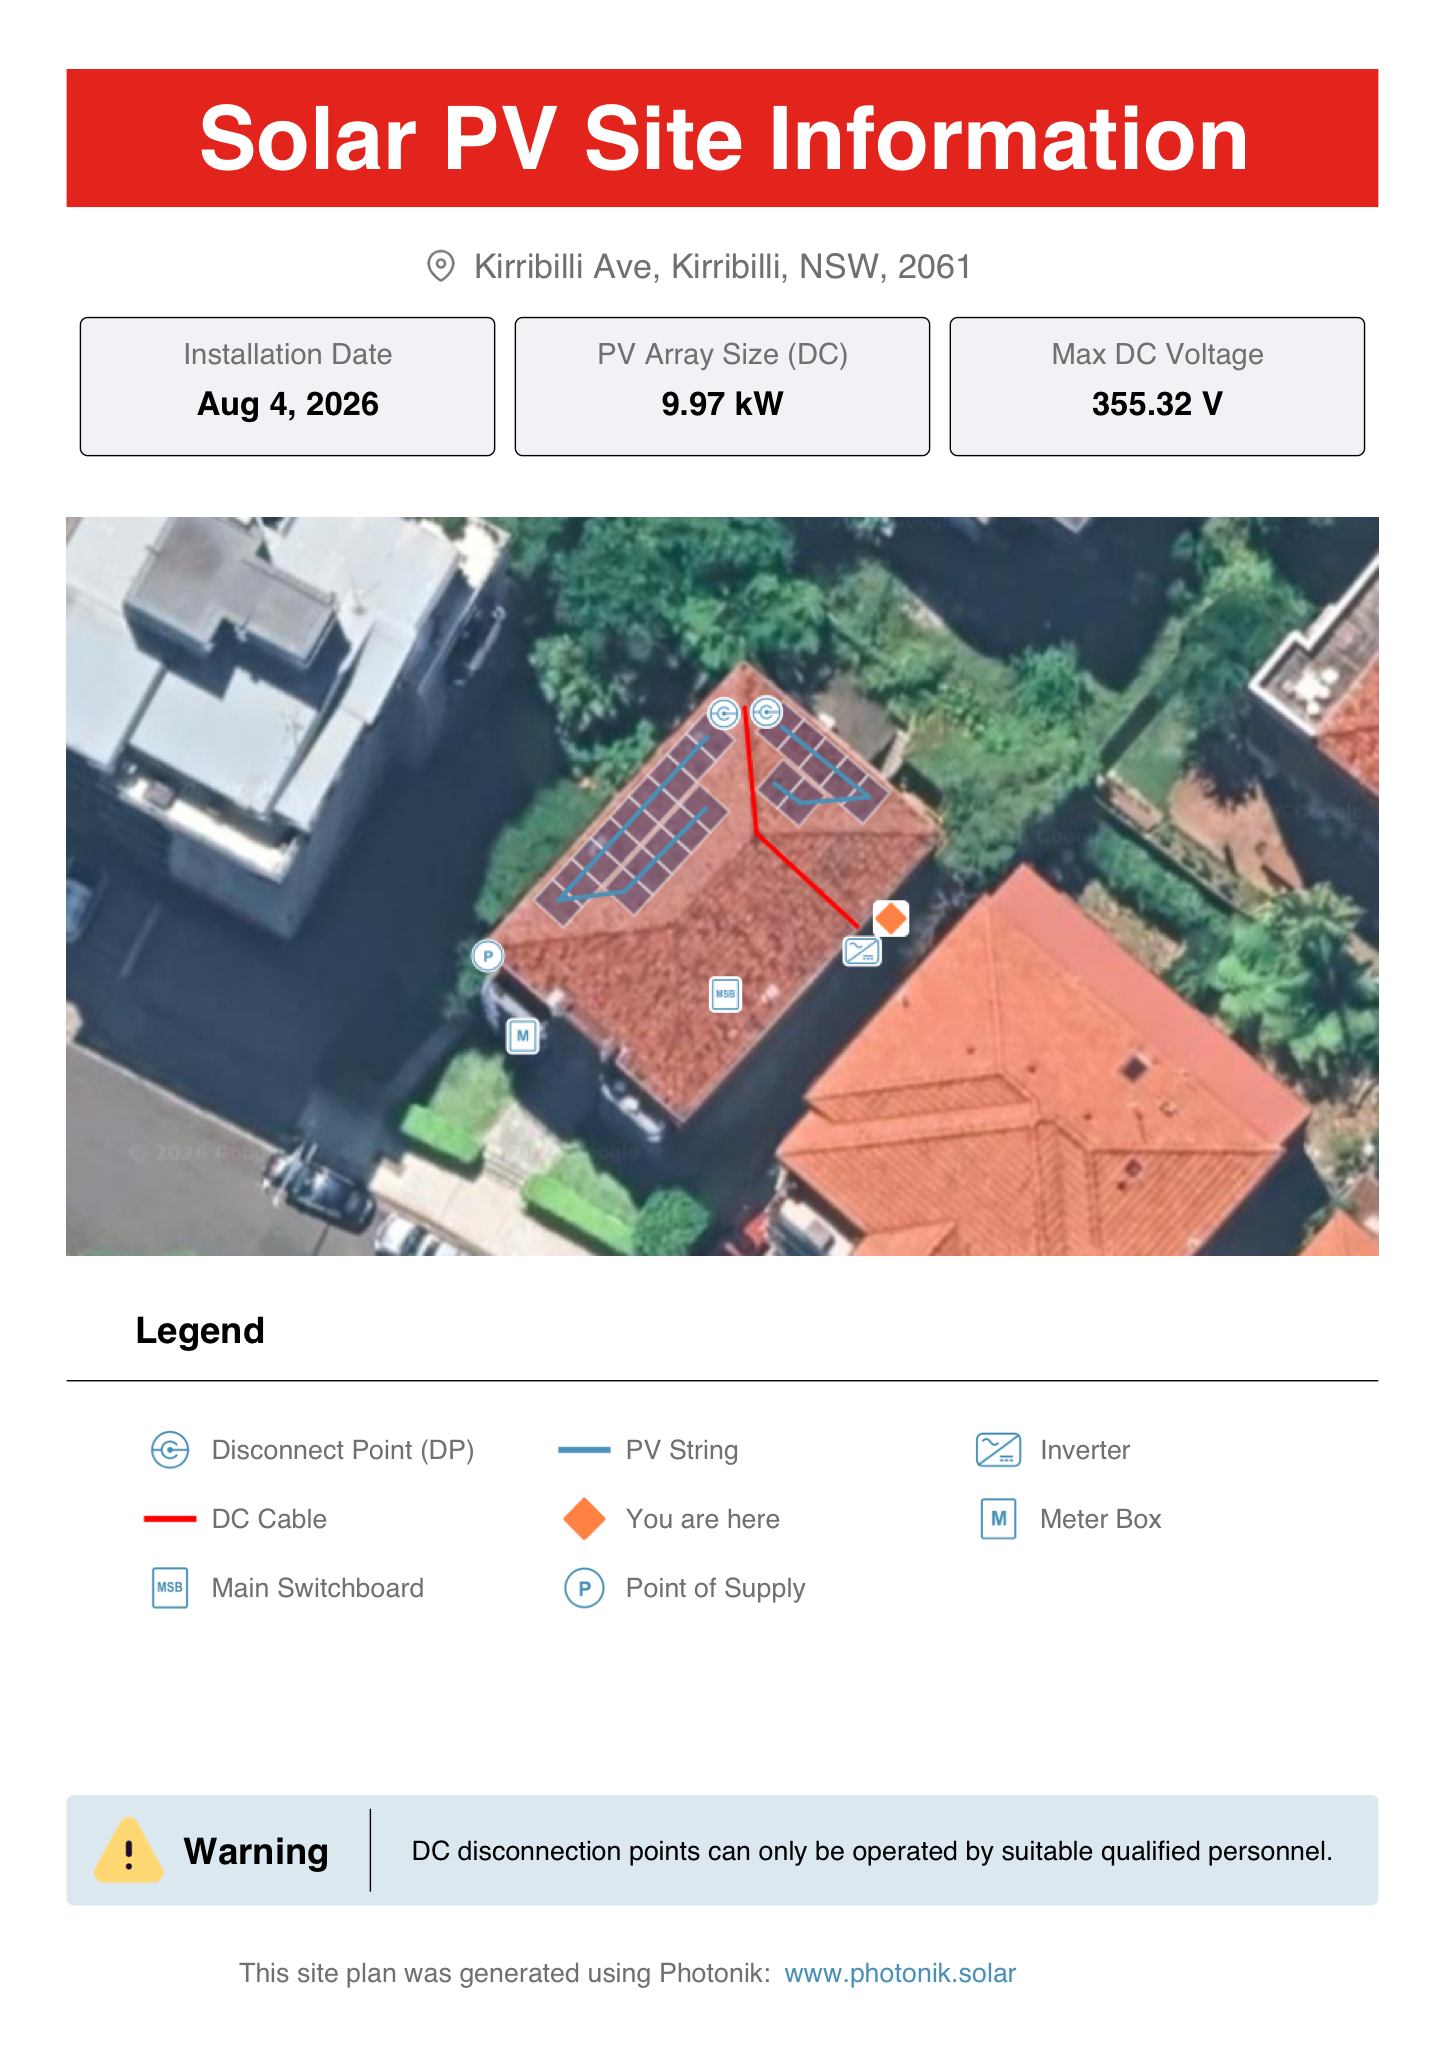
A drawing of the physical job: panel arrays on the roof or ground, inverter and switchboard locations, isolators, and cable runs. Where practical, show which panels belong to which string on the same drawing. Equipment locations belong on this plan — not on a separate “equipment location” sheet.
In Photonik Pro, open Proposal & Documentation and select Site plan for the active design. The annotation editor opens on the aerial map:
- Click Edit to place symbols — inverter, main switchboard, disconnect point, DC isolators, PV strings, and DC cable runs.
- Use Draw line or Polygon for routes and zones when symbols alone are not enough.
- Label strings on the roof if the crew needs string numbers without a separate sheet.
- Click Save, then use the Download icon on the Site plan row to export the PDF for the install crew.
The exported PDF includes the roof layout, equipment legend, and key system details. The same site plan appears in the client proposal from Step 10 — export the final version here after any last tweaks.
Equipment schedule
The kit list (bill of materials): product models and quantities — panels, inverter, battery, racking, and other major items. The crew and warehouse use this to pick stock without opening the full proposal narrative.
In Photonik Pro, the schedule comes from two places:
- System Design — panel model, inverter, battery, and other product selections set the core kit.
- Costs & Pricing — cost groups and line items list quantities and SKUs (racking, labour lines, extras).
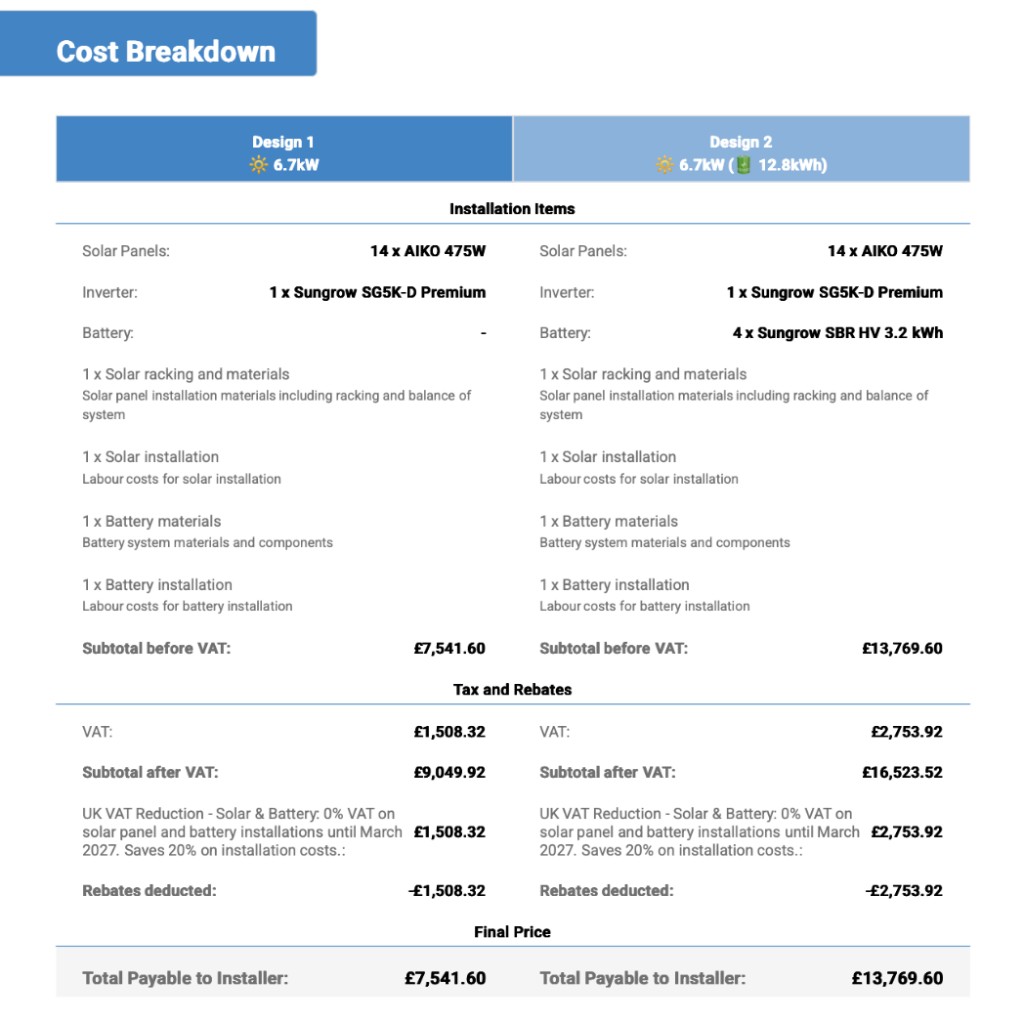
The cost breakdown page on the proposal is a client-friendly view of the same line items — useful as part of the commercial record and for the crew to see what was sold.
Proposal & invoice
The commercial record of what was sold: line items, tax, rebates, total price, and terms. The proposal is what the client signed off on in Step 10; the invoice (or itemised quote) is what you bill against.
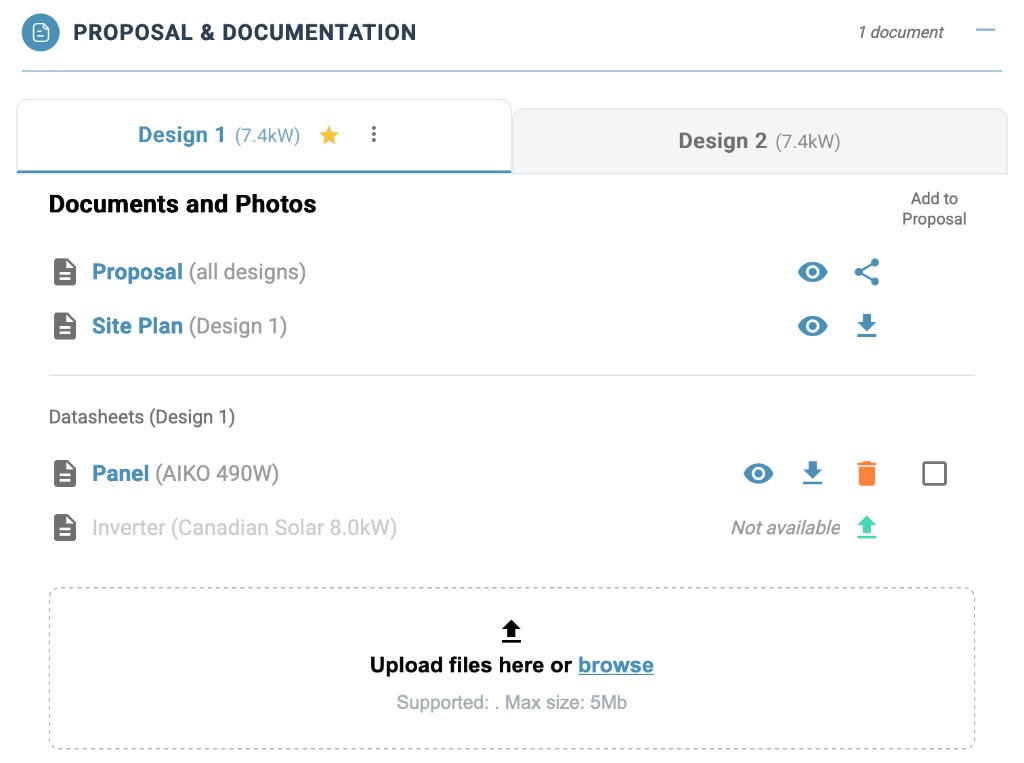
In Photonik Pro, on the same Proposal & Documentation tab, use the Proposal row — View or Share to send the full customer proposal (all designs). Download or share the PDF the client agreed to before handover.
Datasheets
Manufacturer PDFs for the equipment being installed — panels, inverter, battery, and related gear. Installers and inspectors use these for specs, limits, and install notes.
In Photonik Pro, still on Proposal & Documentation, open the Datasheets section for the current design. Photonik attaches product datasheets automatically when they exist in the product library; upload a missing PDF when needed. Tick Add to Proposal only when the client should see a sheet on the proposal — the install crew can download datasheets either way.
SLD and other uploads
Industry handover packs often include a single line diagram (SLD) or separate string-layout sheet. Photonik does not generate an SLD. If you have one from permitting or external design software, upload it under Other docs & photos on the Documentation tab alongside the site plan PDF.
How teams package this varies:
- Site plan only — smaller jobs where strings and cable runs are clear on the annotated plan.
- Site plan + uploaded SLD — common when the permit set already includes a one-line diagram.
- Rich site plan, no extra sheet — strings and routes labelled on one drawing.
Without Pro, assemble the same four documents from your design files, spreadsheet BOM, signed quote, and manufacturer PDFs.
Before you hand over
- Download the site plan PDF and confirm the equipment schedule matches System Design and Costs & Pricing.
- Attach datasheets and any uploaded SLD or permit drawings the crew needs.
End of the design guide
Step 11 is the last step in this workflow. Once the install crew has the site plan, equipment schedule, proposal or invoice, datasheets, and any uploaded electrical drawings they need, the design phase is complete. Commissioning records, as-built updates, and utility sign-off happen after install — outside this guide.