Roof space and shade
A view from above is the fastest way to size up the roof. A satellite image shows how much area you have and where obvious shade falls — trees, neighbouring buildings, chimneys. Note what casts shade and whether it hits panels at midday, when solar output matters most. Allow for vents, skylights, and edge clearances your local rules may require — not every square metre of roof can take panels.
In Photonik Pro, enter the site address on the project, then open Panel Placement in System Design to view the roof on a satellite image and start checking usable area and obvious shade.
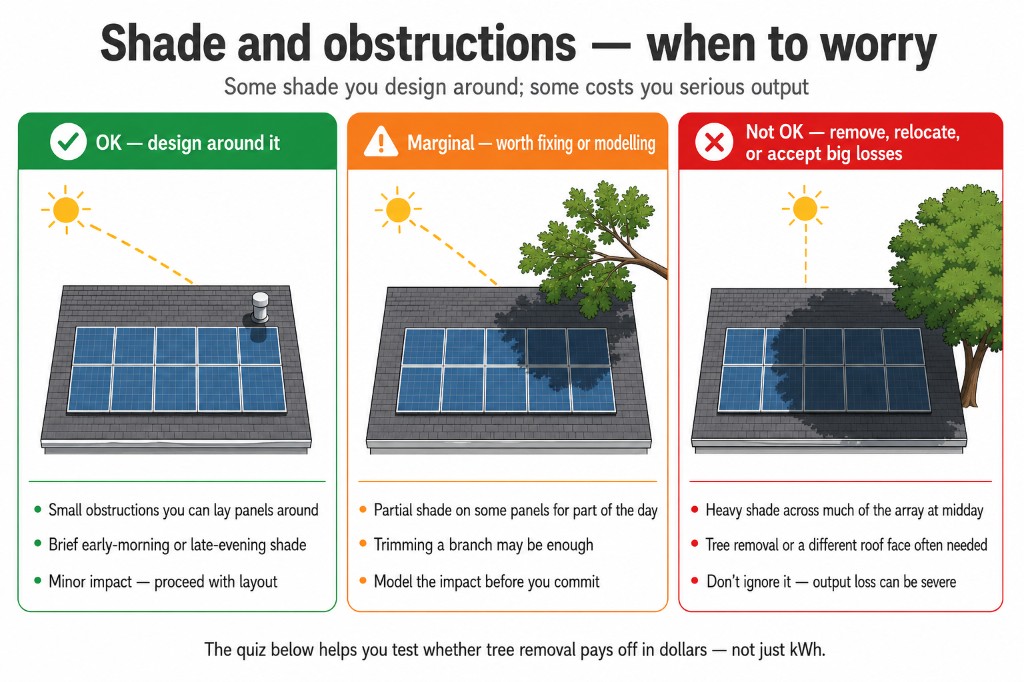
- Usually fine — small obstructions you lay panels around; brief early-morning or late-evening shade on edge panels only.
- Worth a closer look — partial shade on some panels for part of the day. Trimming a branch or moving panels to another roof face may be enough.
- Serious problem — heavy midday shade across much of the array. Tree removal, a different roof face, or accepting much lower output are the realistic options.
Sites with marginal to heavy shading may also benefit from microinverters or power optimisers — each panel works more independently than on a standard string inverter. Step 6 — Choosing an inverter covers when each option is worth the extra cost.
The quiz below tests whether removing a tree pays off in dollars — not just kilowatt-hours.
Roof type and material
Roof shape and covering affect mounting cost and who should do the work. The images below summarise the common cases and the trickier ones.
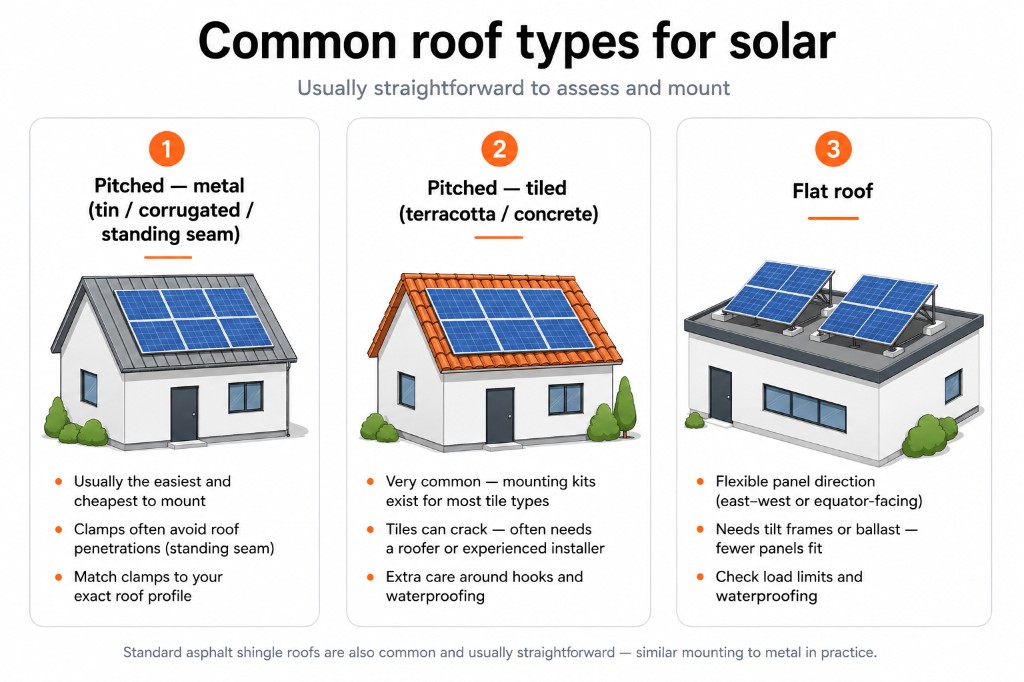
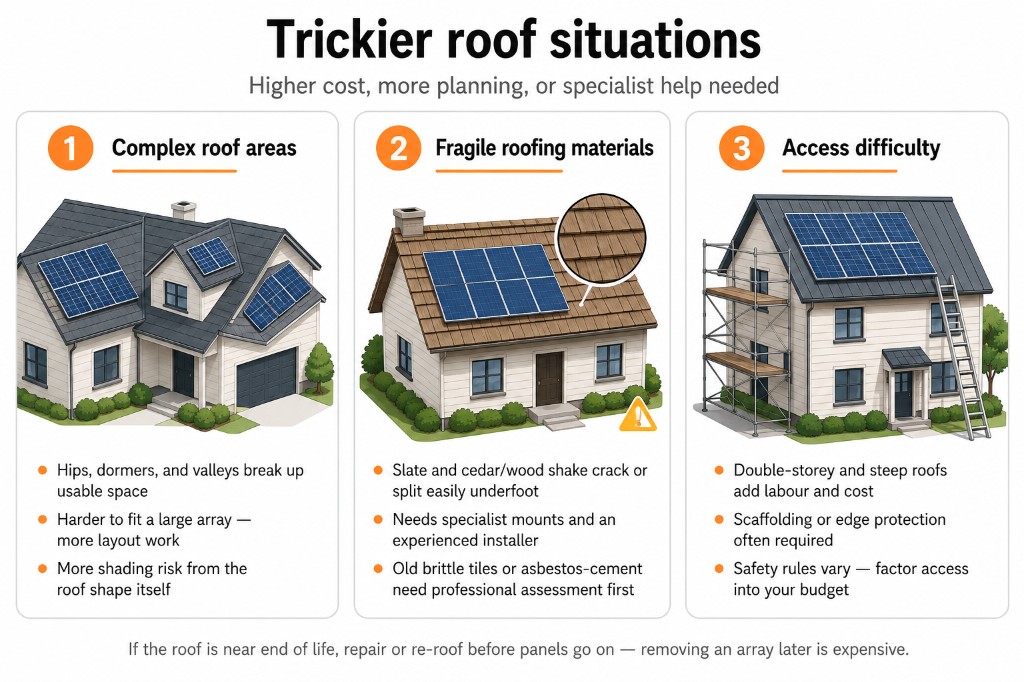
If the roof is near end of life, repair or re-roof before panels go on. Orientation and tilt are covered in Step 5 — Choosing and placing panels.
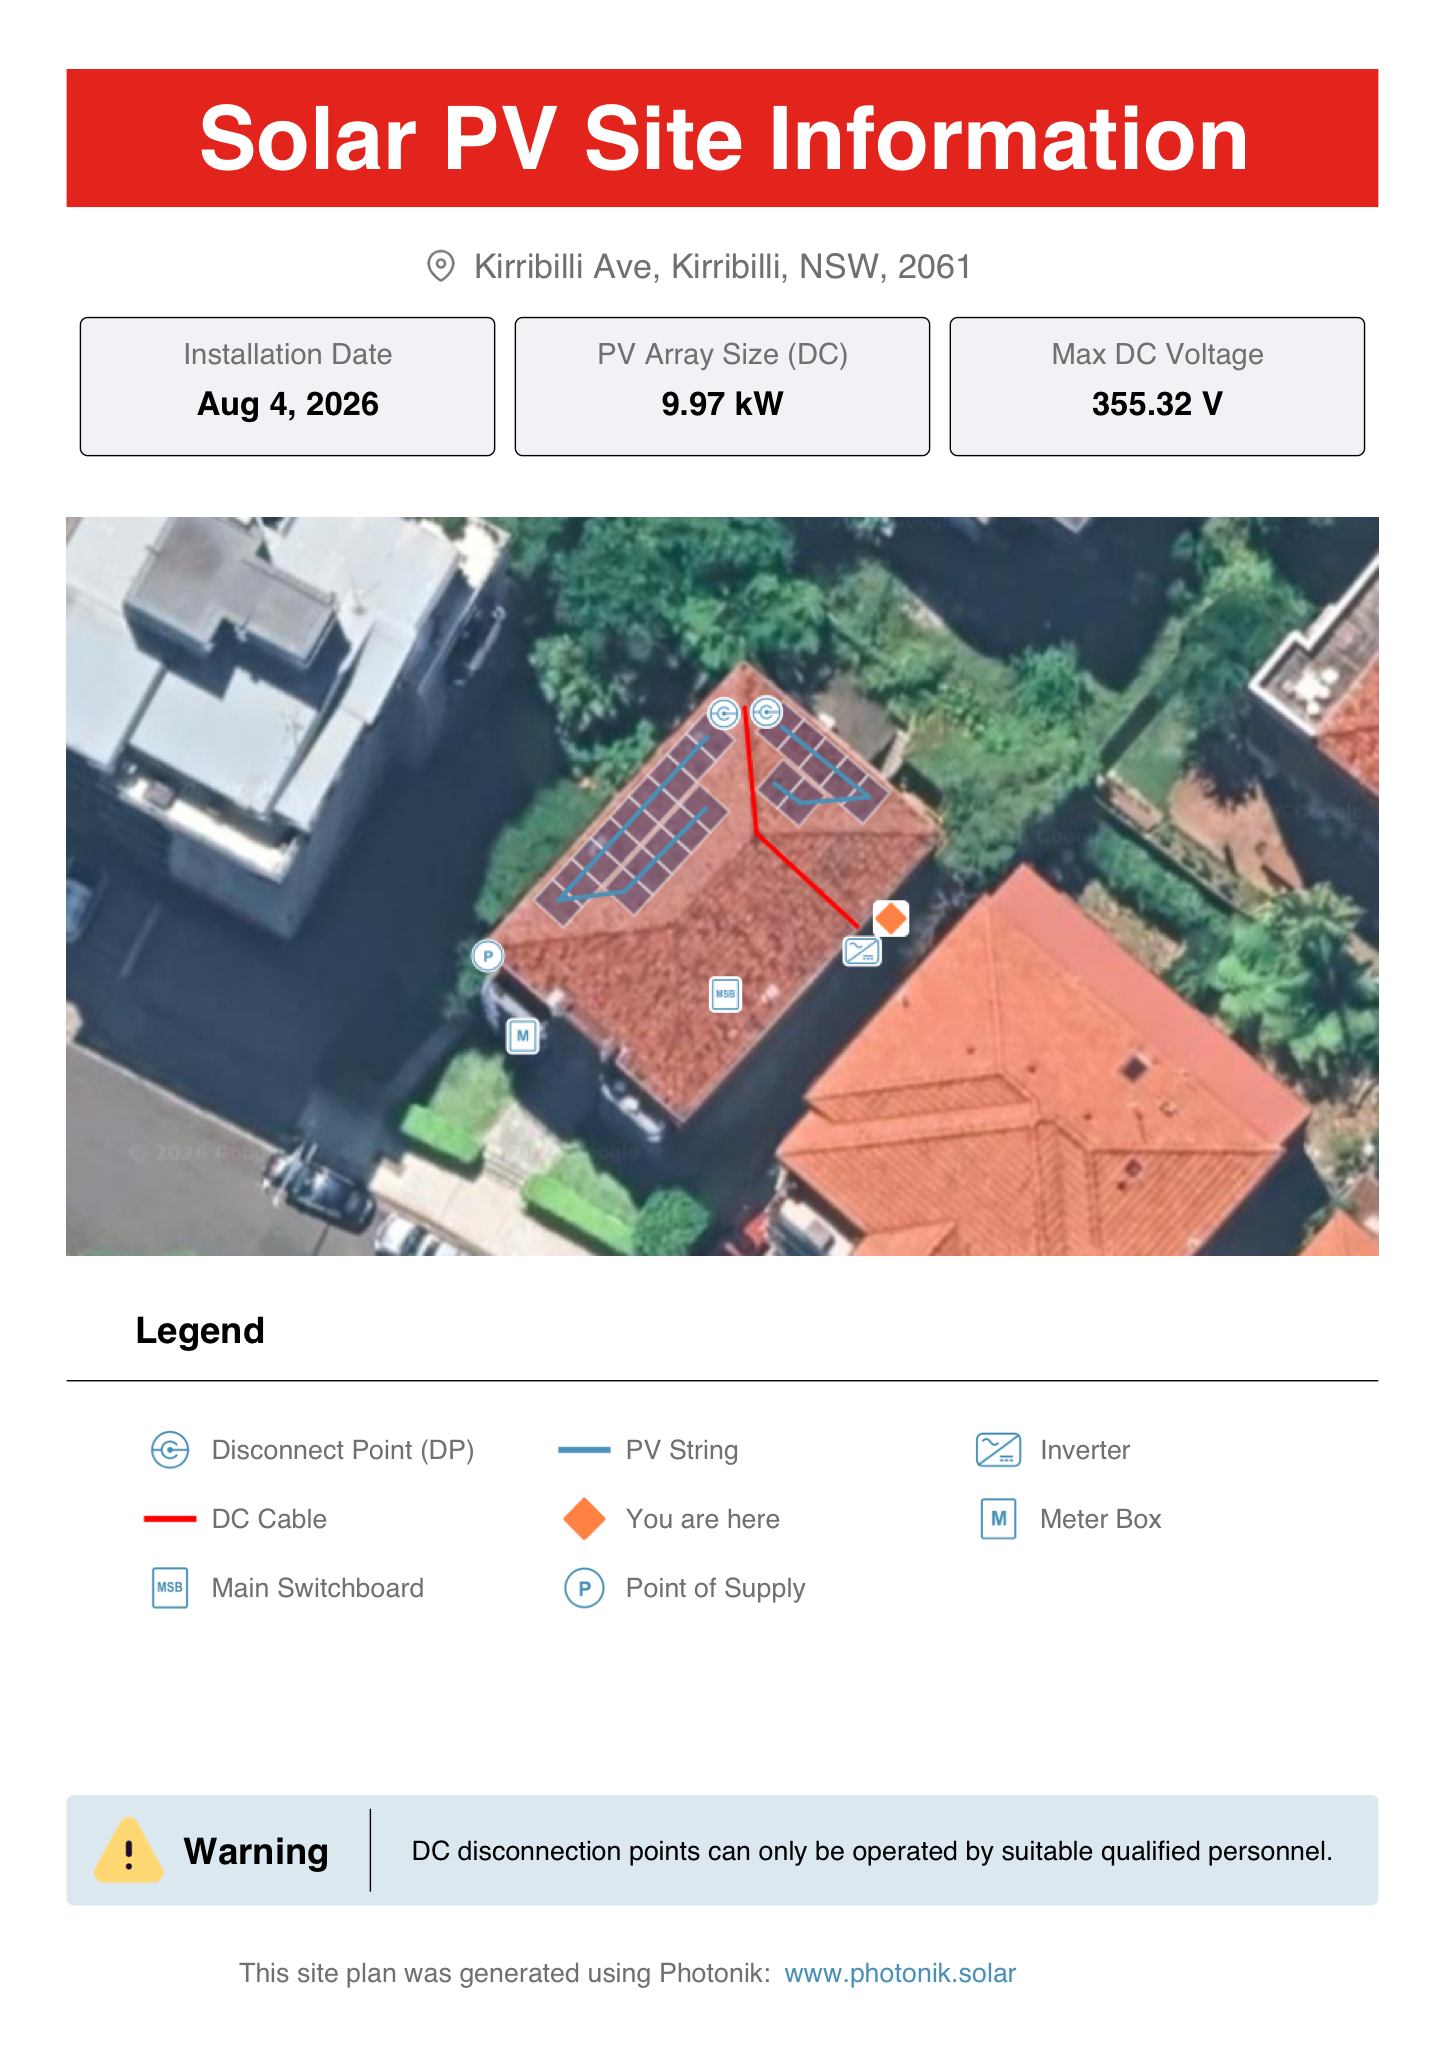
Where things go and cable runs
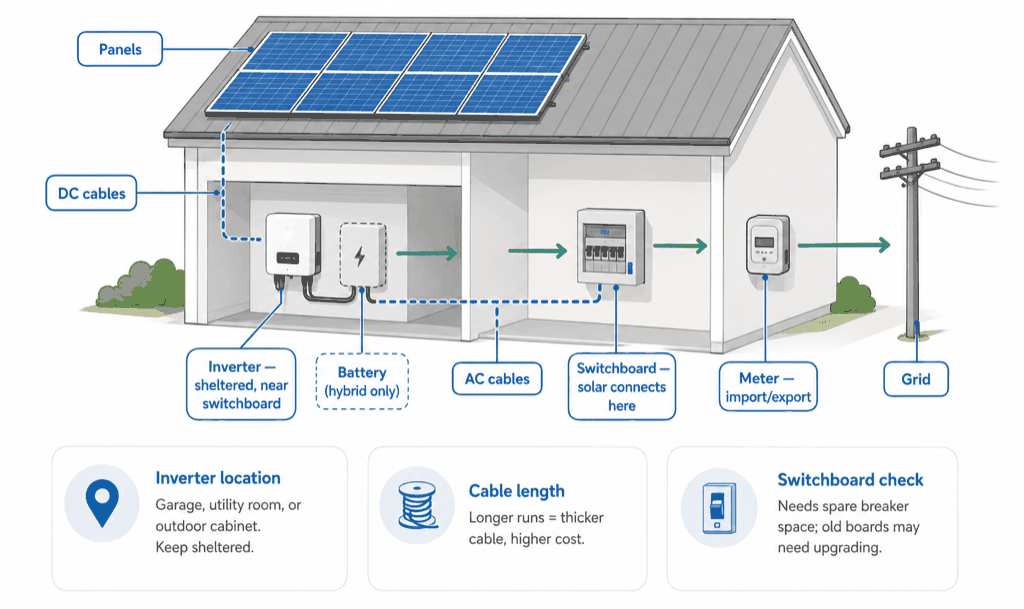
Sketch where the main pieces will sit and how power gets from the roof to the grid connection:
Panels → inverter → switchboard → meter
- Inverter — converts panel power into usable AC. Needs a sheltered spot near the switchboard — garage wall, utility room, or outside cabinet. One central string inverter is common; microinverters sit under each panel. Compare types in Step 6 — Choosing an inverter.
- Battery (if hybrid) — usually near the inverter. Needs space, ventilation, and clearance to local rules.
- Switchboard — your main fuse or breaker box where solar connects into the home wiring. Check that there is spare space for new breakers. An old or crowded board may need upgrading before solar goes in — a licensed electrician can confirm.
- Meter — where the utility measures electricity in and out. Solar often needs a meter that can record export; your utility can tell you if yours is suitable or needs changing.
- Cable runs — note roughly how far cables run from panels to inverter, and from inverter to switchboard. Longer runs mean thicker cable and higher cost.
- Shed or outbuilding — panels on a separate building may need a buried cable route, a sub-board in the outbuilding, and thicker cable over distance. If that building has its own separate utility connection, solar there may not power the main house without rewiring.
Ground mount
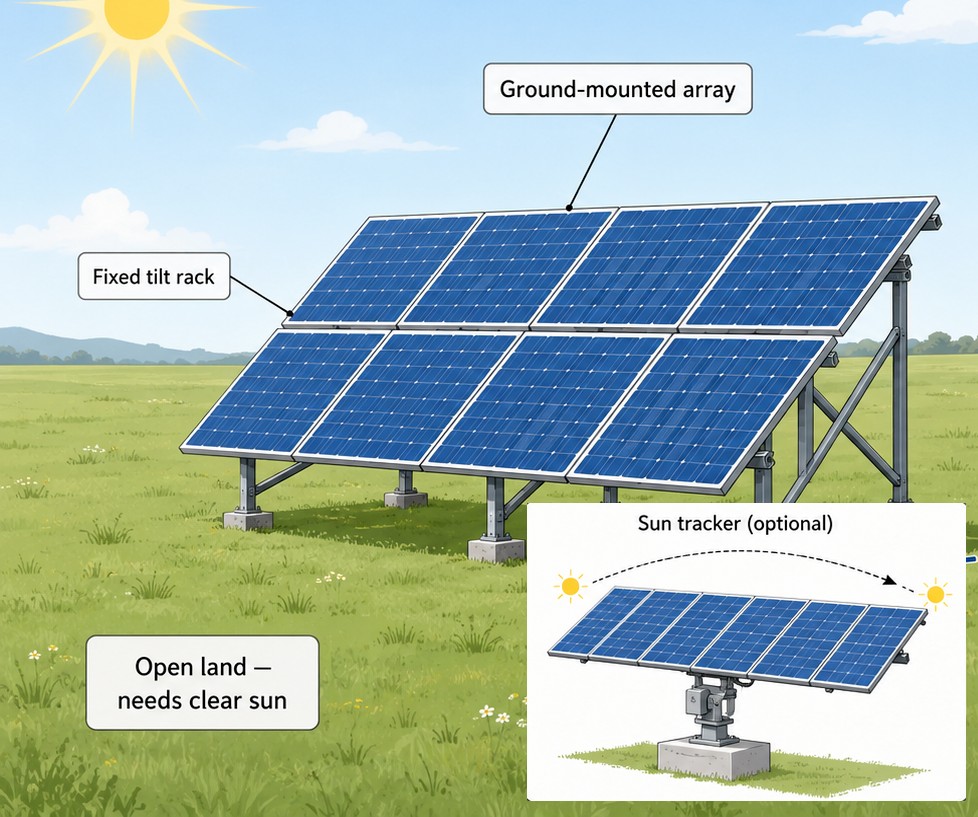
If the roof is too small, too shaded, or in poor condition, a ground-mounted array may work better. You need open land, clear sun, and a cable route to the house switchboard. Some ground-mount systems use a sun tracker that follows the sun across the sky through the day, so each panel captures more energy than a fixed mount — typically around 15–25% more over a year in sunny locations, and less where the weather is often cloudy. Trackers cost more to buy and maintain, so they are more common on larger ground arrays than on a typical home system.
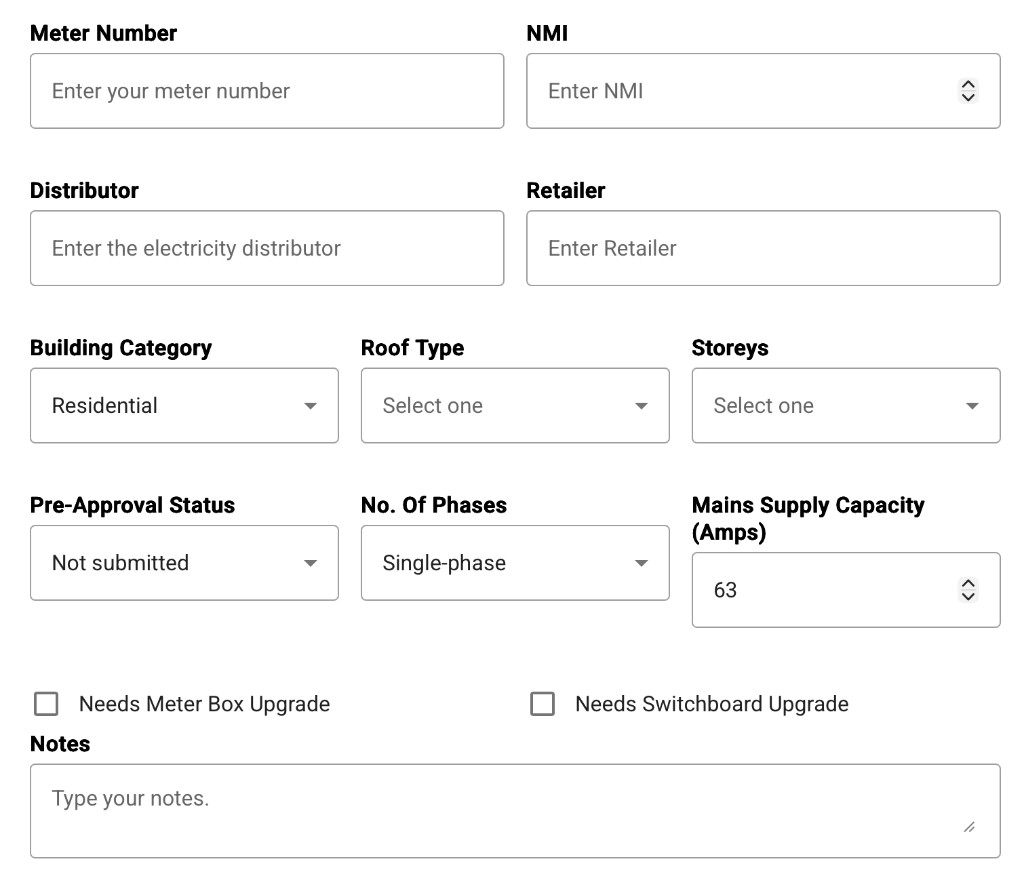
In a real job, site assessment rarely finishes in one visit. Some details come from the customer upfront; others appear after a roof inspection, a call to the distributor, or when the electrician opens the switchboard. Start with what you know and fill gaps as the job progresses.
In Photonik Pro, stay on the Project Details tab from Step 1. Click Show optional fields and capture what you have: meter and NMI, distributor and retailer, roof type and storeys, phase count, mains capacity, and whether the meter box or switchboard needs an upgrade.
In Photonik Pro, open Proposal & Documentation and select Site Plan when you are ready to sketch layout. You do not need a perfect plan on day one, but starting early helps you spot cable-run and equipment-space problems before you lock panel count.
Without Pro, use the panel placement calculator for a single-plane panel count once you know usable roof area. Step 5 — Choosing and placing panels covers full layout in Pro.